Sunday, December 31, 2006

Don't know what a 'blondie' is? Check this out!

Like any reasonably sane person, I love brownies. However, I think I love "blondies" even more.

What's a blondie, you ask? Well, think of making a brownies--except substitute brown sugar for the granulated sugar, and vanilla for the chocolate/cocoa.

The brown sugar-vanilla combo produce a chewy bar cookie that's beyond description, really. Just believe me when I say you won't be able to eat just one (and if you're like me, you'll have a hard time keeping yourself from eating the whole damn pan in one or two sittings).

Peanut Butter Cup Blondies

1 1/2 cups firmly packed light brown sugar
1 cup unsalted butter (2 sticks)
2 1/4 cups all-purpose flour
3/4 teaspoon baking soda
1/2 teaspoon fine salt
2 large eggs
1 teaspoon vanilla extract
16 minature peanut butter cups (white chocolate peanut butter cups are even better!)

Preheat your oven to 375 degrees. Butter and flour a 9-inch square baking dish.

Put the sugar in a large bowl. Melt butter in the microwave in a glass measuring cup. Stir melted butter into the sugar until smooth, cool to room temperature.

In another medium bowl, whisk together the flour, baking soda and salt.

Beat the eggs and vanilla into the sugar mixture. Add flour mixture a bit at a time and mix until a smooth thick batter forms.

Spoon the batter into the prepared dish and spread evenly. Press miniature peanut butter cups into the batter (place four cups, evenly spaced, along each side as a guide).

Bake until blondies are light brown around the edges and a toothpick inserted in the center comes out clean, about 25 minutes. Remove from the oven and let cool completely. Cut into squares and serve.

Wednesday, October 04, 2006

A spicy, stick-to-your-ribs meal you can get on the table in a jiffy!

Here's another meal inspired by that Food Network standby, Rachael Ray. Her version featured chicken and all sorts of time-consuming toppings (a homemade olive-onion salsa and "guacamole cream"). I decided to change things up a bit to make things even easier. Take that Miss 30 Minute Meals!

Latin Sausage and Rice Pot

2-3 tablespoons extra-virgin olive oil
1 medium white-skinned onion, chopped
2 cups white rice
3 cups vegetable stock
1 teaspoon poultry seasoning
1 tablespoon Sazon seasoning blend
1 cup tomato sauce
4 links, vegetarian sausage (I use Tofurky brand Kielbasa), sliced into ½-inch pieces
** another possibility: cubed and fried tofu
1 cup Spanish olives with pimentos, drained and chopped
Sour cream (I use Tofutti brand Guacamole Sour Supreme)

Coat the bottom of a medium saucepan with the oil and then place over medium heat. Add the onion and cook until softened (3-5 minutes). Stir in the rice and cook for another 1-2 minutes. Add vegetable stock, poultry seasoning, Sazon seasoning and tomato sauce. Bring to a quick boil, 2 or 3 minutes. When the liquid boils, reduce heat to low and cook 18-20 minutes, until rice is tender.

When rice is ready, take the pot off the heat and stir in the sausage/kielbasa/tofu. Cover and let sit for a few minutes.

Serve topped with chopped olives and sour cream.

Sunday, October 01, 2006

Fettuccine Alfredo's wicked stepsister

This recipe comes from a cookbook (Vegan With a Vengence) that I bought my sister-in-law last Christmas. David had paged through it before it was all wrapped up, and this was one of the recipes that jumped out at him. It's become a staple in our home ever since (it's one of David's specialties) and it never fails to impress guests.

Just don't go in expecting that old stand-by, Fettuccine Alfredo. Although this dish is creamy, it isn't cloying or overtly cheesey like its namesake. I think you'll love this dish quite on its own, especially since it's far better for your waistline!

Fettuccine Alfreda

1 pound pasta of choice
2 teaspoons olive oil
1 medium onion, chopped
4 cloves garlic, minced
1/2 cup vegetable broth
2 1/2 teaspoons yellow mustard
1/2 cup pine nuts (almonds are a great substitute)
2 1/2 teaspoons soy sauce
2 teaspoons chili powder
3/4 cup nutritional yeast
1/2 teaspoon salt
1/2 teaspoon pepper
1 head of broccoli, cut into florets
Meat of choice (David likes to toast a few Morningstar Farms chicken patties and then slice them into strips)

Coat the bottom of a medium saucepan with the olive oil, then bring up to meat heat. Add onion and cook for about three minutes. Season with a pinch or two of salt and pepper (note: you'll still need the salt and pepper mentioned above for later on in the recipe). Add the garlic and saute for two minutes more.

Meanwhile, toast the nuts in a small frying pan (no oil or grease needed) and cook the pasta according to the directions on the package. Add the broccoli florets during the last two or three minutes to cook through.

In a blender, combine all ingredients except for the pasta, broccoli and meat, and blend until fairly smooth.

When the pasta and broccoli are done, drain and return to the pot they were cooked in. Pour sauce into pot and stir to combine. Serve topped with the sliced chicken patties (or whatever meat you decide to use).

Saturday, September 30, 2006

Pasta salad with pep

My husband and I love to cook. Heck, we just love to eat, period, but we especially love cooking for each other at home. David may not be as adventurous as I am (I try out new recipes all the time, while he tends to stick to his 'tried and true' recipes), but he brings plenty of great dishes to the table. This is one of my favorites. It's so easy it's sick (you know, in a good way), and the salty creaminess of it all grabs me from the first bite.

David’s Peppy Pasta Salad

1 pound penne pasta (or other short, tubular pasta), cooked according to directions
1 1/2 cups frozen peas
1 cup carrots, sliced into medallions
1 package vegetarian pepperoni
4 or 5 green onions, sliced
1 cup mayonnaise
1 or 2 cloves garlic, minced
2 teaspoons freshly squeezed lemon juice
Salt and pepper to taste

Cook pasta according to package directions, then drain and rinse under cold water for a few seconds.

Meanwhile, prepare the vegetables and the sauce. In a small bowl, combine the mayonnaise, garlic, lemon juice, salt and pepper.

When pasta, veggies and sauce are ready, stir together in a large bowl. Taste and season with additional salt and pepper, if needed. Cover with plastic wrap and refrigerate for 30 minutes or until needed.

Friday, September 29, 2006

A sandwich that's good any time of day

That damn Rachel Ray. I want to dislike her, I really do--what with her huge grin, even bigger voice and completely over-the-top personality (not to mention her overused catch phrases). But, try as I might, I can't hate her. It seems like her heart's in the right place and, more importantly, she makes some great-looking, quick-cooking meals on her Food Network show, "30 Minute Meals."

Speaking of which, this recipe was inspired by something I saw her make a few weeks ago. She called her version a "breakfast sammie," which I thought was cute, so I'll call mine "Bryan's veggie breakfast sammie," since it's fully vegetarian (and can easily be made vegan, if that's your thing).

I have a hard time calling this a recipe, to tell you the truth, since the only thing you actually make is the scrambled tofu. Call it what you like--regardless, you can rest assured they're easy and cheap to make, and fantastic to eat.

Bryan's Veggie Breakfast Sammie

1 block herb tofu, crumbled into largish pieces
1-2 cloves garlic, minced
1 medium onion, diced
1 green bell pepper, seeded and diced
8 ounces of white mushrooms, sliced
1-2 teaspoons turmeric
Salt and pepper to taste

4 English muffins, split and toasted
4 vegetarian burger or sausage patties, cooked according to directions
4 slices of American cheese
Mayonnaise (if desired)

Heat a large skillet, coated with olive oil, over medium heat. Add garlic, onion, pepper and mushrooms and cook until softened. Add crumbled tofu, turmeric, salt and pepper and stir until spices have been incorporated (mixture should be a light yellow). Taste and season with more salt and/or pepper if needed.

In the meantime, cook the veggie burgers/sausage patties according to directions and toast muffins. When everything is hot and ready to go, stack them as you wish. I like to go in this order: muffin, mayo, burger, tofu mixture, cheese, muffin top.

A side of potatoes would be a nice accompaniment, but it's not needed if you're planning to eat two of these (or more) by yourself.

That's a (curry) wrap!

I developed this recipe after chatting with a friend about the chicken salad she salivates over at a nearby cafe. She didn't divulge many ingredients--just that it had curry powder in it and was "light." For some reason that put my brain into gear and I started contemplating a vegetarian version of said recipe.

Here's what I came up with after a few trials and errors. Balancing the chutney seems to be the most important step--add too much and it overwhelms the final product, but add too little and there's not enough punch.

Anyway, I like to put a few, nice-sized dollops of the tofu mixture into a whole wheat tortilla and eat it that way. I'm sure it would be good in pitas or on a bed of lettuce or plain as well.

Curry Tofu Wraps

1 block extra firm tofu, drained and cubed
A nice handful of shredded carrot
A nice handful of salted cashews
A small handful of dried cranberries
2-3 green onions, thinly sliced
½ cup sour cream (for vegans: Tofutti Sour Supreme is a perfect substitute)
2 tablespoons prepared mango chutney (use apricot jam if you can't find chutney)
2 teaspoons curry powder
Salt and pepper to taste

Combine the tofu, carrot, nuts, cranberries and green onion in a medium-sized bowl. In a separate bowl, combine the sour cream, chutney, curry powder, salt and pepper. Stir until combined. Pour wet mixture into the bowl containing the tofu mixture. Fold ingredients together with a rubber spatula until the tofu et al is nicely coated with the sauce. Check seasoning and add more salt and pepper if needed. Refrigerate until needed.

Note: This is best the day you make it, as the nuts and berries soften and the tofu seems to sweat a bit. I often just make a half-batch for each day I want to use it - and just keep the second half of the tofu block in the fridge until I want to make it again.

Cookies for monster-sized mouths (and crowds)

An extremely friendly co-worker of mine brought these into our place of business the other day. I should have known I was doomed when she sent out an e-mail announcing their arrival--they contain peanut butter, chocolate chips and M&Ms? Sign me up! I promptly ate three of them, and would have eaten many more if I hadn't mentally decided the cafeteria was off limits.

Thankfully, Teri was nice enough to share her mom's recipe with me, so I can make them whenever I feel the need to put on a dozen or so pounds. The recipe makes a ton, but it's very adaptable, so feel free to cut it in half (and maybe fourths) if you'd like. The batter supposedly freezes well, so you can always bake a few now and freeze individual scoops for later.

Teri's Mom's Monster Cookies

Makes about 8 dozen.

1 pound butter, room temperature
3 pounds crunchy peanut butter
4 ½ cups brown sugar, packed
12 eggs
1 tablespoon white corn syrup
1 tablespoon vanilla extract
18 cups quick-cooking oats
8 teaspoons baking soda
1-pound bag M&Ms candies
12-ounce bag chocolate chips
6-ounce bag peanut butter chips

Preheat oven to 350 degrees.

Cream together butter, peanut butter and sugar in a large mixing bowl. Add eggs, vanilla and corn syrup and mix well. Stir in dry ingredients until combined.

Using an ice cream scoop, drop balls of batter onto a greased cookie sheet and flatten slightly.

Bake at 350 degrees for 12 minutes. Remove from oven and cool on cookie sheets until firm, then place in an air-tight container.

Sunday, June 18, 2006

Just call me a "part-time vegetarian"

If you've spent any time perusing my food blog (http://technofoodie.blogspot.com/), you've likely noticed that all of the recipes shared within are vegetarian. Interestingly--well, I think it's interesting at least--I don't actually lead a fully meat-free lifestyle. I used to, though, and my husband has been a vegetarian for at least the last decade.

Why did I become a vegetarian (or "turned to the dark side," as my parents like to say) and then switch back to being a full-on, carcass-eating carnivore? Thanks for asking, but I'm going to spare you the details. Needless to say it is a long, convoluted story filled with showers of tears (my parents, not mine), and I'm sure you better things to do than sit here and read about the horrors of the meat-packing industry or the overwhelming need to eat a brat (the catalyst to my return to the aforementioned carcass-eating).

That doesn't mean I'm eating hot dogs with every meal, or that I've given up my relationship with vegetables and even tofu. In fact, I still consider myself 90 percent vegetarian--a "part-time vegetarian," if you will. And increasingly, I think that's how many people define themselves, on various levels. You can't pick up a newspaper, open a health magazine or watch a cooking show on TV without being told to "go meatless" once in a while. Science, thankfully, backs up those suggestions. Research conducted by the University of Oxford (England) in 1999 found that vegetarians have a lower mean body mass index (they're skinnier), lower cholesterol levels and a lower mortality from heart disease. That research also mentioned vegetarians may have a lower risk for some other diseases such as constipation, diverticular disease, gallstones and appendicitis.

Those are all pluses for me, but the real reason I continue to prepare and eat meat-free meals is that they make me feel better, feel healthier, than when I eat a lot of chicken or beef. I still eat the occasional sausage or brat, as well as healthier options like chicken and fish, but I also have learned to enjoy meals without them. Below are a few of my favorites--dishes that not only please a crowd, but are easy to make and just as healthy.

Curried Beans and Rice
This has the distinction of being my husband's favorite meal--and that's saying something, because he likes pretty much everything I make. It's also one of my friend's favorite dishes--and she's as far from a vegetarian as you can get.

It's the perfect thing to whip up after a long day at work--the recipe includes a minimal number of ingredients and very little chopping or cutting. Clean up is a breeze, too.

I usually just serve this with a simple salad and some wine. If you're feeding a crowd, a hearty, nutty loaf of bread can be the perfect accompaniment.

1-2 tablespoons vegetable oil
1 red bell pepper, diced
1 white onion, diced
2 or 3 cloves garlic, minced
As much of a jalapeno pepper as you can handle, seeded and minced (optional, though recommended)
15-oz. can kidney beans, drained and rinsed
2 cups uncooked basmati rice
3 cups water
1 1/2 cups coconut milk
1/2 teaspoons freshly ground black pepper
2 teaspoons salt
3-4 teaspoons curry powder
3-4 vegetarian sausages/brats (we prefer Tofurky-brand kielbasa), cut into ½-inch slices

In a large saucepan, heat the oil over medium heat. Add the onion, bell pepper, garlic and jalapeno pepper and cook, stirring occasionally, until the vegetables begin to soften, about 5 minutes.

Stir in the rice, beans, water, coconut milk and seasonings and bring to a simmer. Reduce heat, cover and cook until the rice is tender and the liquid is absorbed, 10 to 15 minutes. Stir in the sausage/brats, cover and let stand for 5 to 10 minutes more. Spoon onto plates and serve hot.

Note: If vegetarian sausages freak you out, feel free to substitute a can of chick peas, drained and rinsed. Really, though, give the sausages a try--they really give the dish a special twist.


Taco Soup
Here's another staple at our house. It calls for a lot of ingredients, but nearly all of them are pre-packaged or canned--the only thing you have to chop up is an onion or two. I love this dish because it is so hearty, and yet healthy, too.

2 onions, diced
2 pounds vegetarian ground beef "crumbles"
2 15-ounce cans pinto beans
1 15-ounce can pink kidney beans
1 15-ounce can hominy (or whole kernel corn), drained
3 14-ounce cans Mexican-style diced tomatoes
4.6-ounce can black olives, drained and sliced
1/2 cup green olives, sliced
1 (1 1/4-ounce) package taco seasoning mix
1 (1-ounce) package ranch salad dressing mix

In a large skillet, saute the diced onion in a few tablespoons of oil until softened. Add the vegetarian crumbles and cook for a few minutes more.

Add the beans, hominy (or corn), tomatoes, black olives, green olives, taco seasoning, and ranch dressing mix and cook over medium heat until the mixture begins to simmer. Reduce the heat to medium-low and continue simmering, covered, for about an hour.

Ladle into individual soup bowls and top with sour cream (light, if you wish), shredded cheese, chopped chives, sliced jalapenos and/or baked tortilla chips and you've got yourself a crowd-pleasing meal.


Black Bean and Vegetable Burritos
This is the first vegetarian meal I ever made, and it's still a frequent visitor to our dinner table. Like the dishes above, this one is a great last-minute option for busy cooks. It's also highly adaptable--you can use pretty much any ingredients that please your palette.

1 medium onion, chopped
1-2 cloves garlic, minced
2 teaspoons vegetable oil
1 teaspoon ground cumin
1 teaspoon chili powder
1 red pepper, chopped
1 cup frozen corn kernels
1 can black beans, rinsed and drained
1 can Mexican-style stewed tomatoes
2 teaspoons red pepper flakes (optional)
Flour tortillas

Heat a few tablespoons of vegetable oil over medium heat in a large skillet. Add the onions, bell pepper and garlic and saute until softened, about six minutes. Add the cumin and chili powder and stir until combined. Add the corn, beans and tomatoess and bring to a simmer. Continue cooking, stirring occasionally, until heated through. Top with the red pepper flakes (if using) and then add salt and pepper to taste.

Spoon about one cup of the filling into each tortilla, top with cheese and sour cream (if desired), roll up and serve.
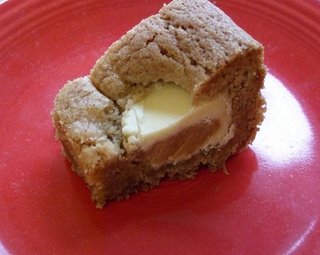
Thursday, June 08, 2006

Little chocolate drops of joy

A colleague of mine - who is a constant source of great, chocolate-filled recipes - just dropped one of these "little pieces of heaven" off at my desk. At first I didn't know what it was - just that it looked like a small piece of very moist and dense chocolate brownie, topped with a white frosting of some sort. After I put it in my mouth, though, I knew I had encountered something much better than a bit of brownie!

These "cookies" taste like OREO-flavored truffles, to tell the truth. And I guess they should, since you use an entire package of the dunkable treats to make them! They're obviously not gourmet by any means, but they sure are tasty when you're looking for something sweet and easy :)

OREO Truffle Drops

One package OREO (regular flavor) cookies
8-ounce package cream cheese, softened
8-10 ounces good white chocolate

Place half of the cookies into the bowl of a food processor and blitz until finely ground. Pour crumbs into the bowl of a stand mixer and the blitz the remaining OREOs in the food processor. Add those crumbs to the bowl of the stand mixer as well.

Add softened cream cheese to cookie crumbs and mix until well blended. Cool if needed, then form into one-inch balls. Melt white chocolate and spoon a dollop of it onto the truffle drops. Cool until white chocolate is firm, then serve.

Friday, May 19, 2006

Move over layer cake!

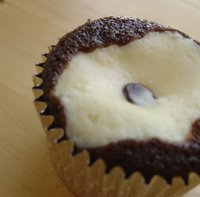
Cupcakes really are a wonderful invention, aren't they? Don't get me wrong, I love digging into a big slice of layer cake as much as the next person, but making one can be a lot of work, and slicing it (and maintaining the cake's appearance) is no, er, piece of cake either. Cupcakes, on the other hand, are a snap to mix, bake and eat. That's especially true with this recipe, since you don't even need to frost them! (Whip up a batch anyway, though, and eat it with a spoon while the cupcakes are baking and cooling.)

I've seen recipes similar in many cookbooks and on even more web sites. Instead of using any of them directly I decided to just make my own version. The chocolate cake "base" of this recipe is simply an iteration of the tried-and-true "krazy cake" recipe from yesteryear. It's not the best-tasting chocolate cake out there (though the inclusion of espresso powder helps give it a boost), but it is very likely the easiest to make.

You can even make these for vegan or lactose-intolerant friends if you use Tofutti-brand 'Better Than Cream Cheese' in place of the regular cream cheese. Leave out the egg--it should be fine without it, though likely more dense.

Black-Bottom Cupcakes

Chocolate base:
1 ½ cup unbleached all-purpose flour
1 cup raw sugar
3 tablespoons cocoa powder
1 teaspoon baking soda
1 teaspoon vanilla extract
1 tablespoon distilled white vinegar
3 tablespoons oil or melted margarine
1 cup cold water, with 1 teaspoon of espresso powder dissolved into it

Cream cheese filling:
1 8-ounce package cream cheese, room temperature
1 large egg
1/3 cup sugar
1 teaspoon vanilla extract
½ cup chocolate chips

You can make this in any order you choose, but I usually make the cream cheese filling a day ahead, just so I have less to do the day I plan to finish off the cupcakes. Make the filling by dumping the first four ingredients (cream cheese, egg, sugar and vanilla) into the bowl of a stand mixer and combine on medium speed until smooth. Stir in the chips by hand, then pour into a separate (smaller) bowl. Cover with plastic wrap and refrigerate until ready to use.

For the cake batter, combine dry ingredients in a large-ish bowl. Add wet ingredients and whisk until combined--don't over beat, though, or you're cupcakes will despise you (as will the people looking forward to your cupcakes!).

Spoon chocolate batter into muffin tins (preferably fitted with paper liners) until they are half or two-thirds full. Add a dollop (perhaps a tablespoon) of the cream cheese filling on top. Place in an oven heated to 350 degrees F for about 20 minutes. The filling will appear nearly set when the cupcakes are done.

Cool to room temperature before eating--or place in the refrigerator until you are ready to polish them off!

The cutest cupboards ever?

David and I have been meaning to re-vamp our kitchen for quite some time--possibly since we moved into our house nearly two years ago. We finally got up the nerve to tackle the cupboards above the sink (which house our dishes and glasses and such) last weekend. Or should I say David got up the nerve :) Hey, I was the creative force behind the decision, OK? That's important, too!

Anyway, what you see here is the product of our handiwork. Isn't it lovely? It probably doesn't translate well to the computer screen, but the red is a wonderful shade--it reminds us both of candy apples and/or watermelon jolly rancher candies :)

Friday, February 10, 2006

Ooey gooey cupcakes (in a good way)

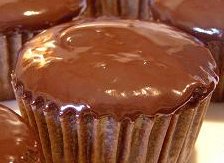
When I saw Ina Garten make these on her Food Network show last weekend, I was shocked--not because the recipe only uses one stick of butter (if you've ever seen the Barefoot Contessa, you KNOW she likes her butter and cream), but because it uses an entire can of Hershey's syrup. And not only that, but no other chocolate is used in the recipe. I wouldn't have thought the chichi grocery stores Ina peruses would even carry Hershey's syrup!

Anyway, the cupcakes looked easy to make and the final product looked quite yummy, so I thought I'd give them a try. Love her or hate her, Ina Garten makes a fabulous dessert. Her 'Outrageous Brownies' (elsewhere on this blog) are the best brownies I've ever tasted (and that has been backed up by nearly everyone I've ever served them to) and her recipes for banana muffins and coconut cupcakes (I'll have to post those sometime soon) are similarly extraordinary (though not for the faint of heart).

As expected, the recipe WAS easy as pie to whip up--and the end result were some of the moistest, most delicious chocolate cupcakes I've ever made.

Although I love the ganache frosting, I may try a whipped ganache next time. The cupcakes are very small and flat, and it would nice to perk them up a bit with a "taller" topping. Still, you can't get much simpler than ganache. I say go with whatever trips your trigger :)

Chocolate Ganache Cupcakes

1/4 pound unsalted butter, at room temperature
1 cup sugar
4 extra-large eggs, at room temperature
1 (16-ounce) can chocolate syrup (recommended: Hershey's)
1 tablespoon pure vanilla extract
1 cup all-purpose flour

For the ganache:
½ cup heavy cream
8 ounces good semisweet chocolate chips
1 teaspoon instant coffee granules
Candy sprinkles, miniature chocolate chips, etc. for decoration (optional)

Line muffin pan with 12 paper liners (note: the recipe will make about 18 regular-sized muffins). Preheat the oven to 325 degrees F.

Cream the butter and sugar in the bowl of an electric mixer fitted with the paddle attachment until light and fluffy. Add the eggs, 1 at a time. Mix in the chocolate syrup and vanilla. Add the flour and mix until just combined.

Scoop the batter into the muffin cups and bake for 30 minutes, or until just set in the middle. Let the cupcakes cool thoroughly in the pan.

For the ganache, cook the heavy cream, chocolate chips, and instant coffee in the top of a double boiler over simmering water until smooth and warm, stirring occasionally.

Dip the top of each cupcake in the ganache. Decorate with candy or chocolate chips, if desired.

Note: The yummy photo at the top of this page was taken by baker and photographer extraordinaire Patrick S. (a frequent visitor to the eGullet forums).

Saturday, January 21, 2006

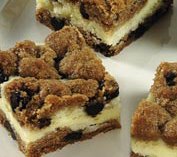
Chocolate chip cheesecake bars

David's co-worker, Elizabeth, brought a pan of these delectable morsels over to our house today as a sweet reward for some hard work we did together (we're trying to stop a state constitutional amendment that would ban marriage for same-sex couples). The fact that I hunted down the recipe and posted it here later that same day should tell you how yummy they are.

The surprising thing is that the recipe calls for two tubes of store-bought cookie dough. Now, I'm usually not a fan of store-bought, pre-made dough or mixes, but here it seems to work just fine. Of course, you can go ahead and make and use your own cookie dough if you'd like. And try using other cookie doughs as well - I imagine a variation featuring sugar cookie dough and strawberry jam swirled into the cream cheese mixture would be quite good
:)

Chocolate Chip Cheesecake Bars

2 rolls/tubes store-bought, refrigerated chocolate chip cookie dough
2 eggs
1 cup of sugar
1 1/2 teaspoon vanilla extract
1 8 oz. package cream cheese

Preheat oven to 350 degrees.

In a medium bowl, mix together the eggs, sugar, vanilla and cream cheese. Set aside.

Press one roll of the cookie dough into the bottom of a 9x13-inch baking pan. Spread cream cheese mixture evenly on top. Crumble remaining roll of cookie dough on top of cream cheese mixture. (It's okay if it's not completely covered.)

Bake for 30 minutes. Cool completely and refrigerate for at least one hour before cutting into bars.

Friday, January 20, 2006

My favorite cookie

I may be a "foodie" who enjoys both cooking and eating many different kinds of food, but I'm no food snob. I like simple dishes and deserts just as much as I like fancier, more "gourmet" offerings.

Take, for example, the recipe below. Everyone and their grandmother (including mine!) makes these cookies, yet despite their omnipresence I still can't help but scarf down one or two (or four or five) every time I see them poking out of a cookie jar.

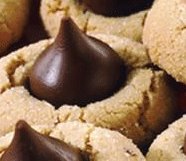
You can poke a lot of different chocolate candies into the top of these lovely blossoms: Hershey's kisses, chocolate stars--or my favorite, miniature peanut butter cups. If you can find the white chocolate variety of mini peanut butter cups, use them--you won't regret it.

I've been meaning to try a unique twist on these cookies for some time - baking them in mini-muffin tins and then creating a well/divit in the center with the end of a wooden spoon or similar utensil. Once cooled I would fill the indentation with chocolate ganache, frosting or even Nutella (mmmm, my mouth is watering at the thought!). I'll let you know if it works out.

Peanut Butter Blossoms

1 cup butter, softened
2/3 cup peanut butter
1 cup sugar
1 cup brown sugar, packed
2 teaspoons vanilla extract
2 eggs, beaten
3 ½ cups all-purpose flour
2 teaspoons baking soda
1 teaspoon salt

Dump the butter and peanut butter into the bowl of a stand mixer, and blend until light and fluffy. Add sugars and then vanilla and eggs, beating until combined well.

Sift the flour, baking soda and salt into a medium bowl and then gradually add to the creamed mixture. Continue mixing just until combined.

Roll into balls and then roll in sugar (if using miniature peanut butter cups, you may want to place balls of dough in greased mini-muffin tins instead of laying them on cookie sheets). Bake at 350 degrees for 8 minutes. Press chocolate star, kiss or peanut butter cup into center and bake for another 2 minutes. Remove from oven and cool completely on a wire rack. Alternately, just bake the cookie portion for 10 minutes, add the chocolate and then let cool.

Wednesday, January 18, 2006

The perfect pie (for me)

I am unashamedly a lover of all things sweet--honestly, I can't think of many desserts that would cause me to turn up my nose. That said, I rarely crave pie. I like a good pecan or pumpkin pie during the holidays, and I like fruit pies (apple and cherry, especially) once in a while in the summer, but it's a rare occasion that I choose to make one over a batch of cookies or brownies or a cake.

The one exception is chocolate cream pie. I've always loved a dense chocolate-pudding pie topped with pillowy whipped cream. The recipe below--from Gourmet magazine--is the best I have ever tasted, from a bakery or home-baked. It looks a bit daunting, perhaps, but it's not--and any time you put into it is well worth it in the end.


Chocolate Cream Pie

For the crust:
1 1/3 cups chocolate cookie crumbs
5 tablespoons unsalted butter, melted
1/4 cup sugar

For the filling:
2/3 cup sugar
1/4 cup cornstarch
1/2 teaspoon salt
4 large egg yolks
3 cups whole milk
5 ounces fine-quality bittersweet chocolate (not unsweetened), melted
2 ounces unsweetened chocolate, melted
2 tablespoons unsalted butter, softened
1 teaspoon vanilla

Make the crust:
Put oven rack in middle position and preheat your oven to 350°F.

Throw all of the crust ingredients into a medium bowl and stir to combine. Press into a 9-inch pie plate and then bake until crisp, about 15 minutes. Cool on a rack.

Make the filling:
In a large, heavy saucepan, whisk together the sugar, cornstarch, salt and yolks. Add the milk in a stream, whisking constantly. Continue whisking and bring to a boil over medium heat. Reduce heat and simmer, continuing to whisk, for about 1 minute (filling will be thick).

Force filling through a fine-mesh sieve into a bowl, then whisk in chocolates, butter and vanilla. Cover surface of filling with buttered plastic wrap and cool completely, at least 2 hours.

Spoon filling into crust and chill pie, loosely covered, at least 6 hours.

Top with freshly made whipped cream (or Cool Whip, whatever trips your trigger) and serve to your salivating guests.